Sunday, May 1, 2011

Pillete

Pillete


Here's the new exciting concept of Bluetooth headset that is so tiny and is almost invisible to the eye when you wear it. Introducing the all new Pillete. This helps you to worry no more looking like a Robot or an alien when walking down towards your destination using big headsets. But of course you have to consider people to start thinking you lost your mind for they cannot almost see the small headset you're wearing.
This is a cool gadget i guess. Pillete!


iPhone


IPhone 4 in hand.jpg
The iPhone is a line of Internet and multimedia-enabled smartphones designed and marketed by Apple Inc. The first iPhone was unveiled by Steve Jobs, CEO of Apple, at the Moscone Center in San Francisco, California on January 9, 2007. The phone was released on June 29, 2007.
An iPhone can function as a video camera, a camera phone with text messaging and visual voicemail, a portable media player, and an Internet client with e-mail and web browsing capabilities, and both Wi-Fi and 3G connectivity. The user interface is built around the device's multi-touch screen, including a virtual keyboard rather than a physical one. Third-party as well as Apple applications are available from the App Store, which launched in mid-2008 and now has well over 300,000 "apps" approved by Apple. These apps have diverse functionalities, including games, reference, GPS navigation, social networking, security and advertising for television shows, films, and celebrities.
There are four generations of iPhone models, and they were accompanied by four major releases of iOS (formerly iPhone OS). The original iPhone was a GSM phone that established design precedents like screen size and button placement that have persisted through all models. The iPhone 3G added 3G cellular network capabilities and A-GPS location. The iPhone 3GS added a compass, faster processor, and higher resolution camera, including video. The iPhone 4 has two cameras for FaceTime video calling and a higher-resolution display. It was released on June 24, 2010. On January 11, 2011, Apple and Verizon together launched a CDMA2000 compatible iPhone 4 specifically for the Verizon network in the US, released on February 10, 2011.

The first generation iPhone during start up    The iPhone 3G displaying the default home screen     The iPhone 3GS displaying the default home screen     The iPhone 3GS displaying the default home screen


Thursday, April 7, 2011

Block Or Unblock Websites Without Software


There are places like schools and offices wherein surfing the internet is limited. That is, some websites are banned or blocked. People who surf the net could also have limited access to websites.

In order to overcome this, you can block or unblock websites that are restricted in the vicinity of your connection and whooo! be connected.

You have to simply follow the following instruction:
For example you want to block www.yahoo.com:


1. Open the folder C:\WINDOWS\system32\drivers\etc2
2. There you will find a file named HOSTS
3.Click on the file and right click.\
4. From the right click menu select Open with .
5. Now, select Notepad to open the file from the list.
6. Now, in the file under the line 127.0.0.1 localhost add another line as 127.0.0.2 www.yahoo.com.
7. File > Save.


Then check the website you are trying to unblock, that is, for our example try opening
www.yahoo.com, and then it will not load.

To unblock sites just do the exact opposite !

I actually got this from a forum. I hope this'll help.

Wednesday, April 6, 2011

15 Useful Google Search Tricks

One of the leading search engine today is Google because it actually caters the user to fully search in less time and efficient result. That is we look on Google in order to look for a topic, shop for some products, find some useful tips, etc. In order to find something over the internet, we normally type the keywords in the Google search bar. It can either be images, articles, news, book or more. But did you know that there are several ways in Google that are said to be "built in" functions which makes searching easier for you. Some of them may look familiar to you but try all of these:


1. Calculator:

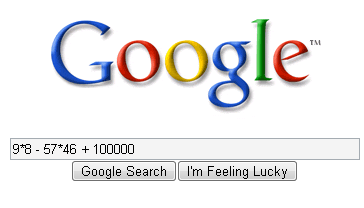
Did you know that Google search can be used as a calculator? It can basically calculate the math, primarily arithmetic with the MDAS rule (Multiplication, Division, Addition and Subtraction). All you have to do is to plug in the arithmetic in the search box and hit Google Search or simply press enter.

You can use the following functions:
+ : for addition
- : for subtraction
* : for multiplication
/ : for division
^ :is used to denote "to the power of"
sqrt : is used to denoted the "square root of a number"


2. Dictionary.
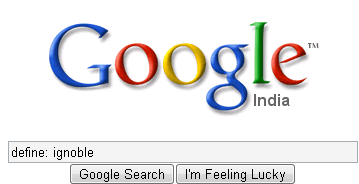
You can simply look for the some definitions or meanings in the internet directly using Google. Define words you want by writing the word "define: " following the word you wanted to have some definitions. For example, we want to find the definition of ignoble. Then simply, put the following in the search box:


define: ignoble


Google will display a list of dictionary definitions/meanings for that word/phrase.


3. Searching for a specific title.

Suppose, over the internet, you actually find an article that is truly great for you but sad to say, you forgot to came across with the website, or somehow you forgot to bookmarked it, then you can easily find it with the help of Google provided that you know the article's title. This is how to do it:

Say for example you read an article "Simple Internet Tricks: Discreet and Amazing" then you can look for it by simply typing "intitle: Simple Internet Tricks: Discreet and Amazing". Then the article you are looking for will surely be placed on page 1 of the results.


4. Google Converter.

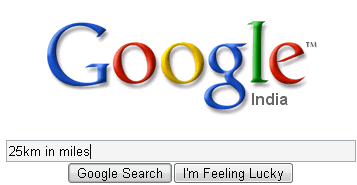
Did you ever know that you can use Google to be a unit converter? You can convert units like meters to inches, kilometers to miles, liters to cubic centimeters, and etc. You can do it by typing "10km in miles" for converting km into miles, "2liters in ml" for converting liters to ml, and etc. Try it yourself!


5. Comparing currencies.

Google also has a built in currency converter. It converts any currency to your desired currency equivalent. You just simply have to put the conversion you'd like in Google search box then hit Search. For example: "1 USD in YEN"


6. Weather Updates.

You can easily find an update of weather condition in any place. In order to find out, all you have to do is to type the place followed by the word "weather". For instance: "tokyo weather"


7. Searching for specific file types.

There are lots file types over the internet and searching for a specific one is not that easy. But having the following tips, you can easily look for a specific one.
For example, if you wanna search for "Tips on Healthy Living" in docx format. You can do it by using "filetype:" function. In order to find the docx version of the topic, you need to type in the search bar the following: "Tips on Healthy Living filetype:docx"


Search on a particular website:
If you want to search for something from a particular site using Google search then you can do so by using the “site:” feature. Here’s how you do it:
Let’s say you want to search for cloverfield DVD on Amazon, you can do so by typing “cloverfield DVD site:www.amazon.com”


Get the local time anywhere:
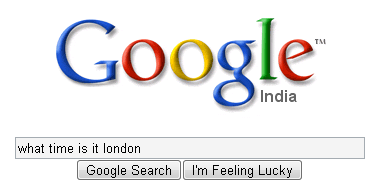
Wanna know what time is it in London now? You can ask Google by typing “what time is it London” in the search bar. You can also enter “time (location)” without the quotes.


Remove unwanted search results:
Suppose you wanted to search a Harry potter book review but you ended up in getting reviews of the movie rather than the book. Well in this case you can make Google to exclude the movie results from the search. You can do so by adding “-movie” at the end of the term. For instance: “Harry potter Chamber of secrets -movie” This will give search results excluding the movie- The chamber of secrets.


Search for URLs:
You can even search for URLs in Google search.For instance: “Women_talk_three_times_as_much_as_men”. You can also use “.” “-” instead of “_“. The search will bring up results with the URLs containing the above words entered.


Track flight status:
You can also track a particular flight status. All you need to do is just enter the airline and flight number into the search box and hit enter. You’ll get the arrival and departure time of the flight right inside Google’s search results.


Search Google groups by the subject line:
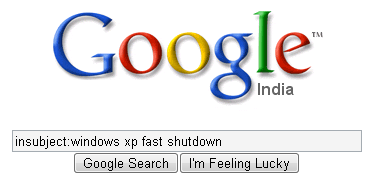
You need to be in the google groups search page before attempting this query; otherwise it might not work correctly. Using the “insubject:” function you can search google groups by the subject line. For instance “insubject:windows xp fast shutdown”


Find related sites:
Suppose you find an interesting website and you would like to find some other alternative to this site then you can do so by using “related:” function. For instance if you want to search an alternative for google.com you can do so by entering “related:www.google.com”


Find links to a specific URL:
You can find the webpages which have a link to a specific URL using the “link:” function. This is really great as it will help you if you own a website, you can easily find out the pages linking to a page in your site. To use it, you need to enter the whole URL after “link:”
For instance “link:http://www.cnn.com”
Well that’s it for now, hope you liked them. If you know more feel free to mention them here.


Whois Lookup service:

You can also search for information on a particular domain name. Just type in “whois domain.com” and hit enter. You’ll get to see the creation and expiry dates of the domain.


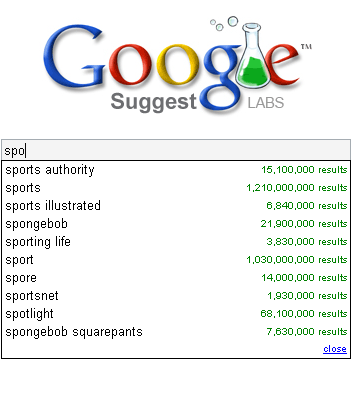
Suggests words, phrases and their results:

This is really helpful if you aren’t able to spell a particular word or you would like to know the results a particular word would contain when searched.

23 Coolest Firefox Tricks Ever!

1. More screen space.

Make your icons small. Go to View - Toolbars - Customize and check the “Use small icons” box.


2. Smart keywords.

If there’s a search you use a lot (let’s say IMDB.com’s people search), this is an awesome tool that not many people use. Right-click on the search box, select “Add a Keyword for this search”, give the keyword a name and an easy-to-type and easy-to-remember shortcut name (let’s say “actor”) and save it. Now, when you want to do an actor search, go to Firefox’s address bar, type “actor” and the name of the actor and press return. Instant search! You can do this with any search box.


3. Keyboard shortcuts.

This is where you become a real Jedi. It just takes a little while to learn these, but once you do, your browsing will be super fast. Here are some of the most common (and my personal favs):

* Spacebar (page down)
* Shift-Spacebar (page up)
* Ctrl+F (find)
* Alt-N (find next)
* Ctrl+D (bookmark page)
* Ctrl+T (new tab)
* Ctrl+K (go to search box)
* Ctrl+L (go to address bar)
* Ctrl+= (increase text size)
* Ctrl+- (decrease text size)
* Ctrl-W (close tab)
* F5 (reload)
* Alt-Home (go to home page)


4. Auto-complete.

This is another keyboard shortcut, but it’s not commonly known and very useful. Go to the address bar (Control-L) and type the name of the site without the “www” or the “.com”. Let’s say “google”. Then press Control-Enter, and it will automatically fill in the “www” and the “.com” and take you there - like magic! For .net addresses, press Shift-Enter, and for .org addresses, press Control-Shift-Enter.


5. Tab navigation.

Instead of using the mouse to select different tabs that you have open, use the keyboard. Here are the shortcuts:

* Ctrl+Tab (rotate forward among tabs)
* Ctrl+Shft+Tab (rotate to the previous tab)
* Ctrl+1-9 (choose a number to jump to a specific tab)


6. Mouse shortcuts.


Sometimes you’re already using your mouse and it’s easier to use a mouse shortcut than to go back to the keyboard. Master these cool ones:

* Middle click on link (opens in new tab)
* Shift-scroll down (previous page)
* Shift-scroll up (next page)
* Ctrl-scroll up (decrease text size)
* Ctrl-scroll down (increase text size)
* Middle click on a tab (closes tab)


7. Delete items from address bar history.

Firefox’s ability to automatically show previous URLs you’ve visited, as you type, in the address bar’s drop-down history menu is very cool. But sometimes you just don’t want those URLs to show up (I won’t ask why). Go to the address bar (Ctrl-L), start typing an address, and the drop-down menu will appear with the URLs of pages you’ve visited with those letters in them. Use the down-arrow to go down to an address you want to delete, and press the Delete key to make it disappear.


8. User chrome.

If you really want to trick out your Firefox, you’ll want to create a UserChrome.css file and customize your browser. It’s a bit complicated to get into here, but check out this tutorial.


9. Create a user.js file.

Another way to customize Firefox, creating a user.js file can really speed up your browsing. You’ll need to create a text file named user.js in your profile folder (see this to find out where the profile folder is) and see this example user.js file that you can modify. Created by techlifeweb.com, this example explains some of the things you can do in its comments.


10. about:config.

The true power user’s tool, about.config isn’t something to mess with if you don’t know what a setting does. You can get to the main configuration screen by putting about:config in the browser’s address bar. See Mozillazine’s about:config tips and screenshots.


11. Add a keyword for a bookmark

. Go to your bookmarks much faster by giving them keywords. Right-click the bookmark and then select Properties. Put a short keyword in the keyword field, save it, and now you can type that keyword in the address bar and it will go to that bookmark.


12. Speed up Firefox.

If you have a broadband connection (and most of us do), you can use pipelining to speed up your page loads. This allows Firefox to load multiple things on a page at once, instead of one at a time (by default, it’s optimized for dialup connections). Here’s how:

* Type “about:config” into the address bar and hit return. Type “network.http” in the filter field, and change the following settings (double-click on them to change them):
* Set “network.http.pipelining” to “true”
* Set “network.http.proxy.pipelining” to “true”
* Set “network.http.pipelining.maxrequests” to a number like 30. This will allow it to make 30 requests at once.
* Also, right-click anywhere and select New-> Integer. Name it “nglayout.initialpaint.delay” and set its value to “0?. This value is the amount of time the browser waits before it acts on information it receives.


13. Limit RAM usage.

If Firefox takes up too much memory on your computer, you can limit the amount of RAM it is allowed to us. Again, go to about:config, filter “browser.cache” and select “browser.cache.disk.capacity”. It’s set to 50000, but you can lower it, depending on how much memory you have. Try 15000 if you have between 512MB and 1GB ram.


14. Reduce RAM usage further for when Firefox is minimized.


This setting will move Firefox to your hard drive when you minimize it, taking up much less memory. And there is no noticeable difference in speed when you restore Firefox, so it’s definitely worth a go. Again, go to about:config, right-click anywhere and select New-> Boolean. Name it “config.trim_on_minimize” and set it to TRUE. You have to restart Firefox for these settings to take effect.


15. Move or remove the close tab button.


Do you accidentally click on the close button of Firefox’s tabs? You can move them or remove them, again through about:config. Edit the preference for “browser.tabs.closeButtons”. Here are the meanings of each value:

* 0: Display a close button on the active tab only
* 1: (Default) Display close buttons on all tabs
* 2: Don’t display any close buttons
* 3: Display a single close button at the end of the tab bar (Firefox 1.x behavior)


16. Build your own Firefox search engine

Want to power up Firefox's search box? It's easy to create your own search engine, so that you can rifle through any site from right within Firefox. Adding a search engine that has already been written, of course, is easy. Click the down arrow to the left of the search box, select "Manage Search Engines," then click the "Get more search engines" link at the bottom of the screen. From the Web site that appears, click the search engine you want to install, and you're done.

There are plenty of sites that don't have prebuilt search engines, though. No problem: It's easy to build your own search engine. First install the OpenSearchFox add-on. Then, when you're on a search site, right-click the search box and choose the Add OpenSearch plug-in. From the screen that appears (shown below), type in the name that you want to be associated with the search engine, add a description of the search engine and click Next. Then click Finish, and the site will be added as a search engine that you can choose like any other -- by clicking the arrow to the left of the search box and selecting the engine.
 Building your own Firefox search engine. (Click image to see larger view)

Note that as of this writing, OpenSearchFox doesn't work properly with Firefox v. 2.0.0.10 or 2.0.0.11, although it may be fixed as you read this. When you use the add-on in v. 2.0.0.1 or 2.0.0.11, you'll get an error message after you click Finish, although in some instances, even if you get the error message, the search engine will still be added.


17. Use keywords to speed up your searching

Don't want to go to the trouble of adding your search engine -- or you can't get OpenSearchFox to work properly? Here's another way to do an instant search. When you're at a site, right-click on its search box and select "Add a Keyword for this Search." Type in a name for it and an easy-to-remember shortcut (for example, hp for the Huffington Post blog site). Then click OK. Now, to search the site, go to the Address Bar, and type in your shortcut, followed by a search term, such as hp Clinton. You'll search the site, just as if you were there. Note that on occasion, the search won't work properly, but it will on most sites.


18. Use keywords to speed up bookmarks

Visiting your favorite sites using Firefox's bookmarks is far too much of a chore -- do you really want to do all that mousing around? Instead, you can use keywords to instantly jump to any site you've bookmarked. To do it, after you bookmark a site, right-click on the bookmark, select Properties, type in a short keyword (or even just a letter or two) in the keyword field and click OK. Now, to visit the site, type in the keyword in Firefox's address bar, and you'll jump straight to the site.


Adding a keyword to a bookmark. (Click image to see larger view)


19. Put your own graphic on the Firefox tool bar

If you don't like the plain background of Firefox's tool bar, don't worry -- you can put your own graphic there. Type the following into the userChrome.css file and put the graphic that you want to use, background.gif, in the same directory as userChrome.css. The graphic can be any name and any type of image file supported by Firefox.

Here's the code to use:
/* Change the toolbar graphic */
menubar, toolbox, toolbar, .tabbrowser-tabs {
background-image: url("background.gif") !important;
background-color: none !important;
}

The graphic you use will automatically be scaled to fit the tool bar. For example, if it's small, it will be tiled.


20. Hack the stop, back and forward buttons

Are you a minimalist? Does it annoy you that there's a big fat Stop button on the Firefox tool bar, even when there's nothing to stop? And how about the Forward and Back buttons -- if there's no place to go forward or back, would you like them simply to disappear?
You're in luck, because it's simple to do. Add these lines below to userChrome.css. Note that even after this trick, the buttons will appear when there's a use for them. For example, when a page is loading, the Stop button will appear, so that you can stop loading the page; it just won't appear when a page isn't loading. And the Forward and Back buttons will appear when there's something to go forward or back to:

/* Remove the Stop button when content isn't loading*/
#stop-button[disabled="true"] { display: none; }

/* Remove the Back button when there's nothing to go back to */
#back-button[disabled="true"] { display: none; }

/* Remove the Forward button when there's nothing to go forward to */
#forward-button[disabled="true"] { display: none; }


21. Move the sidebar to the right

Firefox has a sidebar for viewing your history or bookmarks. It normally displays on the left-hand side when you choose View-->Sidebar. If you prefer, though, you can have the sidebar instead appear on the right, by typing this code into the userChrome.css file:

/* Place the sidebar on the right edge of the window */
hbox#browser { direction: rtl; }
hbox#browser > vbox { direction: ltr; }
After hacking userChrome.css, you can make the Sidebar appear on the right, instead of on the left.


22. Change the search bar width

Don't like the width of the search bar on the upper-right hand corner of Firefox? No problem -- it's easy to change. All you need to do is specify the width you want, in pixels. Use this code in userChrome.css to tell the search bar to be 600 pixels wide, but you can, of course, use whatever size you want:


/* Make the Search box wider
(in this case 600 pixels wide) */
#search-container, #searchbar {
max-width: 600px !important;
width: 600px !important; }


Here's the normal-size search box ...


... and here it is, after the hack, 600 pixels wide.


23. Remove menu items

Are there menu items -- for example, Help -- that you never use? If so, you can easily make them disappear. To remove the Help menu, add this to userChrome.css:

/* Remove the Help menu */
menu[label="Help"] {
display: none !important; }

You can remove any of the other menus as well. Use the same syntax as above and substitute its name (File, Edit, View, History, Bookmarks or Tools). So, for example, to remove both the Help and Tools menu, you'd add these lines to userChrome.css:

/* Remove the Help and Tools menus */
menu[label="Tools"], menu[label="Help"] {
display: none !important; }

MSN Messenger Tricks

These tricks require that MSN Plus! Live is installed on your PC:

1. Sending Continuous Nudge

You might have experienced this before: one of your friend on MSN messenger keeps sending you non-stop nudges continuously, until you can hardly do anything on your MSN messenger. When you try to do the same back to him, you get the message "You may not send a nudge that often". If you have this experience before, I bet you will be desperately trying to find out how did your friend do those annoying stuff while you are not able to the same. And the answer is you need to install the NudgesToolsScript in order to do this. Just download the script and execute it (double click the .plsc file.. you will get a warning message.. just check the the check box that says "I accept the responsibility of installing this script" and click 'Import'). After installing the script, you will now be able to send continuous nudges to your friend with no delay. If you really want to annoy any of your friend :P, type "/sendnudge 1000 100" (without the double quotes) and hit enter. Your friend will then get 1000 nudges every 100 milliseconds! By the default setting, your own chat window will also be vibrating when you send nudges.. To prevent vibration on your own chat window, do this: go to Tools > Option > Messages, and uncheck the "Allow me to send and receive nudges" checkbox so that your chat window will not vibrate when sending nudges to your friend. To stop the nudges, type "/stopnudge" and it will stop immediately.


2. Find out if somebody has blocked you on MSN


This is probably one of the most frequently asked question: how can I know if someone has block me on MSN messenger. There are lots of online services out there which claims to be able to check if someone has blocked you. As far as I know, many of them contains some sort of spyware, and will intrudes your MSN and sends annoying automated messages to all of your contacts. So instead of using those so called MSN block checker, here's a manual way to check if someone has blocked you:

1. Register a new MSN account. Use a different nick name so that no one can recognize that it's you.
2. Sign in to MSN on both your actual account and your new fake account. Having MP!L installed, you can sign in to 2 separate session of MSN simultaneously using different account.
3. Add the contact that you want to check using your new account. If at anytime, someone appears online, or accept you into his/her contact on the new account, but appears offline in your actual account, he/she has blocked you.

This seems to be a more troublesome way, but it saves you from being intruded by spyware, and most importantly, it works.


3. Cool effects on MSN display name

This is a cool trick that enable you to easily edit your display name and make it looks cooler. Install the script NameEditor. Then go to the script button (somewhere on the top of the messenger), and choose NameEditor > Edit Name. The Name Editor window will appears, which which enable you to fill in some cool effects for your display name. This will easily make your name stand out among all the names in your friends' contact list.


4. Check Gmail with MSN Messenger

The original MSN Messenger will only alert you when you receive an email in your Hotmail account. With the Gmail Checker script, we will also be receiving incoming email alert for Gmail account. A pretty useful feature to be added to MSN Messenger!


5. Let your keyboard's LED alert you when you have incoming message


This is a cool script that will flashes your keyboard's LED, and plays a beep sound from your laptop when you receive incoming MSN message. Just install the script KeyFlasher, and start playing around with the script configuration. You can specify which LED to flash (Num Lock / Caps Lock / Scroll Lock), the speed of the flashes, amount of the flashes, etc.. Simple and fun!


6. Easily translate the text in chat window

Another very useful and cool script to be installed on your MSN messenger is the GoogleTranslator. You can easily translate the text in your chat window into another language by just hitting F5 on your keyboard. As the script name suggest, this script is using Google's translator to do the translation.. which means it supports multiple languages translation! A really useful script.

10 Yahoo Messenger Tricks You Shouldn't Miss!


1. Finding an invisible user on your yahoo messenger list:

Want to find out someone who’s hiding from you? You can easily do so by going to Yahoo Invisible Checker at http://invisible-scanner.com/ . All you need to do is type in the Yahoo! ID and the particular users status will be revealed.

2. Run Multiple Instances of Yahoo Messenger on same system:

Some of you might be having more than one yahoo ID would like to log in simultaneously. Here is an easy way to do it without installing any sort of software. You just have to edit the registry and voila there you go. Follow the instructions from here.

3. Invisible Nickname In chat rooms

Just go to edit profile and in the nick name type a (space character) on it just press Alt 0160 ( or ALT+255 ) and save it.

Now go to any yahoo chat room and you’ll notice that your nick name is empty. [Alt+0160 is a keyboard shortcut for space]

4. Removing Ads from your Yahoo Messenger

If you are using Yahoo Messenger 8.0, then you can disable ads by following the below steps:
1. First close the Yahoo Messenger.
2. Save this .bat file and execute it.
NOTE: You won’t be able to enter the chat rooms if you use this patch.
This above fix doesn’t work for Yahoo Messenger 9 Beta. Here’s a way to disable the ads in Yahoo Messenger 9:

1. Make sure the Yahoo Messenger isn’t running, if it is then just close it.
2. Now backup the following file C:\Program Files\Yahoo!\Messenger\YahooMessenger.exe (create a new copy)
3. Download HxD hex editor.
4. Open C:\Program Files\Yahoo!\Messenger\YahooMessenger.exe in the hex editor
5. Now go to the offset 295928 (in HxD: Search/GoTo)
6. Look at the right column and replace y from “y.m.s.g.r.a.d.s” with p
7. Save the file and close HxD.

NOTE: This approach breaks Yahoo Messenger’s terms of service.

>> If nothing works try launching this file.

5. Yahoo! Smiley Codes!

You can make use of all smileys including hidden ones in your messenger by using YEmotePLUS plugin.

6. Change the Yahoo Messenger Title Bar

You can change the text that appears at the very top of the yahoo messenger window by editing the ymsgr.ini file.

1. Go to Program Files\Yahoo\ and open ymsgr.ini.
2. Then at the end, type this:
[APP TITLE]
caption=YOUR TEXT
3. Change YOUR TEXT to whatever you want it to say. Then save the file and close messenger. When you restart messenger you will see your new message.

7. Creating Custom Profiles for Chat

You can create custom profiles with different name, sex and other details from Yahoo Create/Edit Profiles. You can use these for chat services only.

8. Online Status Changer and Manager

HyperIM is currently the best status changer & manager for Yahoo messenger available at present. You can download it from here.

9. Retrieve Yahoo! Messenger Display pictures

Y! Display Pic will retrieve yahoo users even if they are offline or invisible. You can download it from here.

10. Access Yahoo Messenger Chat archives while offline

You can access your Yahoo chat logs using Yahoo Message Archive Decoder. It reads Yahoo! Messenger archive files (.dat files) and presents them in a format that you can read. It decodes the message archive without logging in (offline mode and no passwords required). You can download it from here.